Storage for the FF UFO Challenge

0

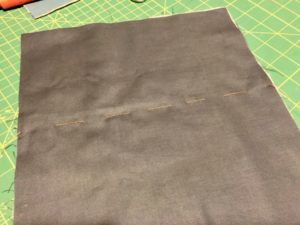
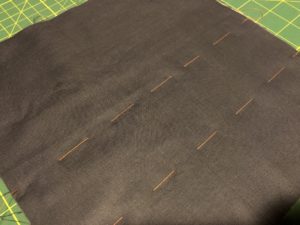
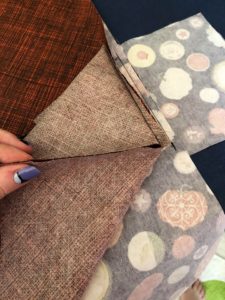
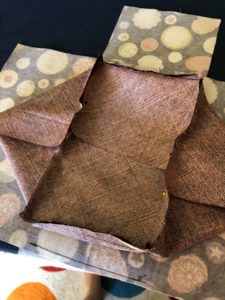
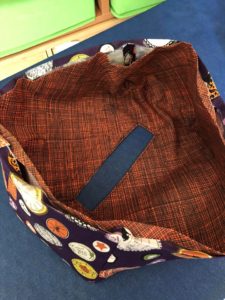
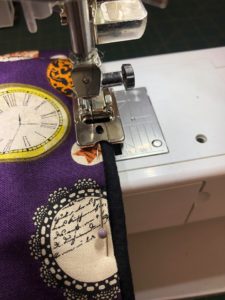
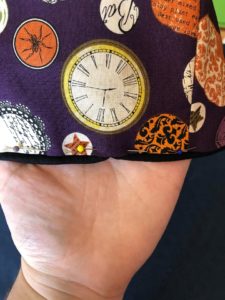
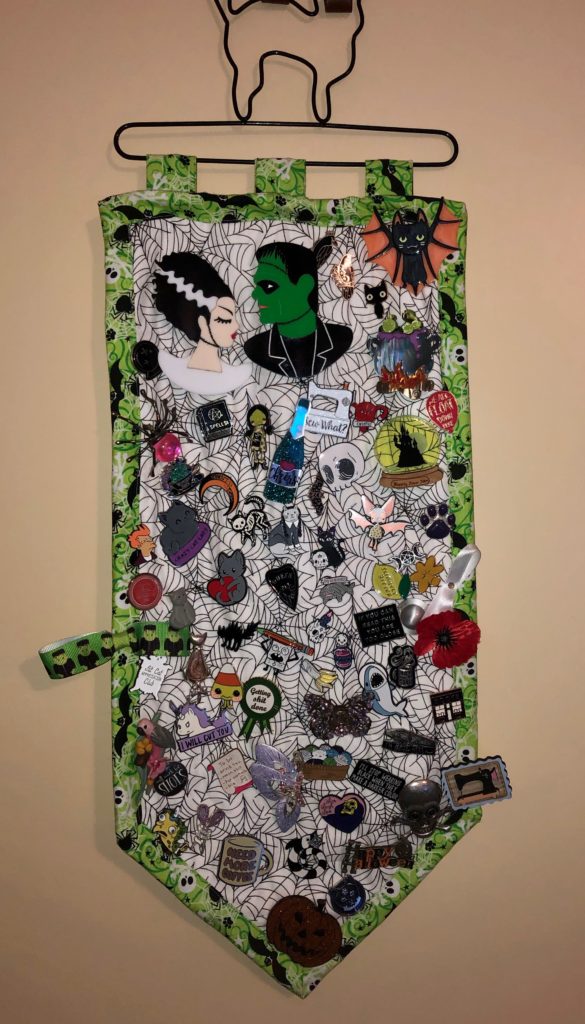
One of the things that I’ve found over the years doing UFO challenges that is important to making sure that I’m organised, is storage of my projects. It keeps the whole project together, especially if you’ve got lots of pieces of fabric, a pattern, specific gadgets and tools, matching threads and any embellishments. Everything is on hand when you pull the project when I draw the month’s number. I also like to leave myself a note in with the project as to where I was up to, just so I can dive back into the project without spending half a day sorting through bits to figure it out all over again.

Previously I tried the whole ziplock bag thing but they are slippery little suckers and honestly not big enough to store the project and all the accessories and other bits needed. It’s not my favourite way to store items but it does work for some things.

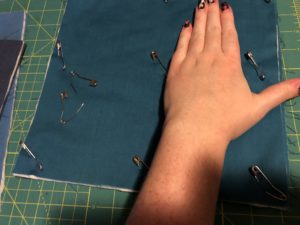
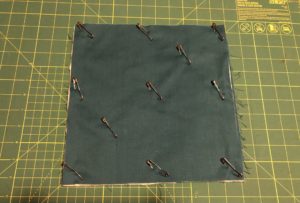
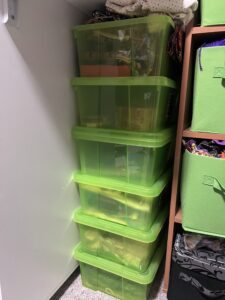
So for the projects on my second list I am using the green tubs I bought years ago. I have 12 of them in total so I’ll just need 10 and one project per tub. I don’t label them as I rotate projects through these tubs so I don’t want anything permanent on them. They stack under my desk and cutting bench and are easily accessible. Any project that won’t fit in one of these tubs can use the 2 leftover tubs as overflow or wherever the project is currently sitting – for example my re-upholstery job is a chair and it’s in my craft room. Sort of in the road but it is what it is.

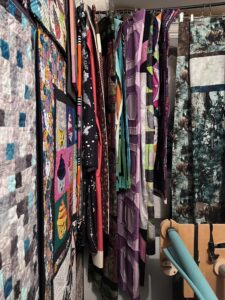
Projects on my first list are all quilt tops. These have been hanging up in my quilting studio on a curtain rod, using trouser  hangs – you know the clippy ones – so that the quilts and their backings stay nice and wrinkle free. This is a great way to store quilt tops and backing if you have the space. If I had a hanging space in a wardrobe I would have used that space but I like MacGyvering things and I had a spare curtain rod.


Storage is one of those things I find to be a personal preference thing. Like buying a wallet or something that you want to have really specific settings or a layout. I know everyone’s sewing space is wildly different and we require different setups in order to function. I personally like a room that kind of looks like chaos – it fuels my inspiration having all that colour and texture around me, all my little collectibles and things that I love. But storage in general is a stressor. It never what it needs to be, the right size or shape or its been built in somewhere that’s not practical (I’m looking at you built-in wardrobes with no shelves). I also have found over the years in all the houses I’ve lived in that rentals never have practical storage. And I know this is a slight tangent – not speaking about craft specific storage here – but it seems to be across the board no matter what you are trying to store.

I’ve definitely been guilty of buying storage when I don’t need it. But I have gotten better over the years and now I’m in a decluttering phase. Trying to stop the over consumerism, use what I have and streamline things in my living spaces.

This challenge is an attempt to male inroads on that streamlining. I want to clear the decks of “stuff”.

So, what kinds of storage are you using for this challenge? Feel free to share as maybe your storage ideas will help someone else decide what they want to do.

Remember, I’ll be sharing each month’s numbers across my socials so you can participate from any source but if you would like to join the FB group that is where most of the discussion will be happening.

FB Group: facebook.com/groups/1401125050180861
Facebook: https://www.facebook.com/frankiesfabrics
Instagram: https://instagram.com/frankiesfabrics/
Threads: https://www.threads.net/@frankiesfabrics


FF UFO Challenge details

Hello all!

I’m going to blog about the steps I’m taking for the UFO Challenge so that it might help guide some in making decisions about how they can approach their own UFO stash.

I’ve decided that I am going to make two lists. One is my main “focus” list and the second will be more of a “if I get a chance to work on” list. I’m breaking these UFOs into these categories because that helps reduce the overwhelming feeling of how much I need to do and narrows down the focus of what types of things need doing.

So list one is my machine quilting list. I do have 12 projects on this list however 3 of them are smaller projects that could be done as a pair for one month and one with another bigger project or even if I just have time. Remember – not a competition and NO pressure.

Machine Quilting UFO Challenge 2025

NUMBERQUILT NAMEMONTHDONE
1Halloween QAL
2Gemstone Layer Cake
3Cherrylicious
4Tarot Quilter
5Pinwheel Jelly Roll
6GemCut
7Fairy Garden
8Halloween Wedding Ring
9Vladimir's Memorial
10aTapestry 1 - Snake
10bTapestry 2 - Triqueta
FloatingTapestry 3 - Tree

Each of the projects in this list is at the stage of ready to be quilted. Most of them have backing or binding in various states. Wadding is all accounted for.

So ideally the plan is draw the random number on the 1st of the month, pull that project and quilt it when I get the chance in between work, study and customer quilting with the goal that it is bound and complete by the end of the month.

List two is all the projects that I want to make some form of progress on. These are projects that are in various stages and are various types of projects.

UFO Challenge 2025 - Assorted Projects

NUMBERQUILT NAMEMONTHDONE
1Witchy Cross-stitch
2Chair - mach emb
3Snake quilt FP
4Snake quilt w/blocks
5Plant trivets
6Yellow rug
7Log Cabin
8Raven quilt
9Lounge room runners
10Paint bookshelf

I’ll do another post about storage for UFOs because there’s A LOT to talk about when it comes to storage.

I’ll be sharing each month’s numbers across my socials so you can participate from any source but if you would like to join the FB group that is where most of the discussion will be happening.

FB Group: facebook.com/groups/1401125050180861
Facebook: https://www.facebook.com/frankiesfabrics
Instagram: https://instagram.com/frankiesfabrics/
Threads: https://www.threads.net/@frankiesfabrics

Happy sewing!

Marni x


Frankenstein’s Fabrics 2025 UFO Challenge


This year is all about my two words for 2025 – “new” and “use”.

New is all about experiences and trying new things like cheeses, coffees, restaurants and having adventures, visiting new places.

Use is about using the items I already own before I consider buying anything. Using things up, using the good teacups and the nice perfume, using things until they fall apart, using in an effort to declutter.

So to that end I am setting myself the 2025 UFO Challenge. First I will go through my craft room and collect all my UFOs – UnFinished Objects and write them up on a list and number them 1-10 (I will have more than one list for sure). Each month from February to November on the 1st of the month I will draw a random number from 1-10 and work on that project each month. I will post that number to my socials in an effort to hold myself accountable and to try and make inroads into my craft space and declutter things.

I am not doing January or December because those months are already filled with too much going on that I don’t want to add another thing to that pile.

If you would like to join in please click this link and join the FB group or follow my socials.
Facebook: https://www.facebook.com/frankiesfabrics
Instagram: https://instagram.com/frankiesfabrics/
Threads: https://www.threads.net/@frankiesfabrics


2020 Christmas machine quilting schedule

Hello everyone!

Just popping in to say whew! What a year!

Christmas is right around the corner and because of what Covid-19 has done to gatherings this year if you want to ensure you have that special quilty present for family you can’t visit then please let me know ASAP. Quilt bookings are filling up fast, but as I’ve changed my work schedule some spaces have now opened up.

Please have the following information ready when you book:

  • Name
  • Phone number
  • Size of quilt top in inches
  • If you have backing/need backing
  • If you have wadding/need wadding
  • What type of wadding you have – please NO WOOL
  • Date you need the quilt back
  • Thread colour if you have an idea of what you would like
  • Design ideas if you have a preference for a theme/style
  • If you want it trimmed back
  • If you want me to bind it for you/fabric for binding

To book:

Ring or text: 0416 023 637

Email: frankensteinsfabrics@hotmail.com

You can send me photos if you need to show me specific things/designs etc.

I can’t wait to see what you’ve all been up to.

Marni x


The great elastic shortage

So… first it was toilet paper and now it’s elastic.

Hat elastic, 3mm and 6mm elastic is in short supply at the moment because everyone who can sew seems to be mass making masks to deal with Covid-19.

So I am here to say this…

YOU DON’T NEED ELASTIC.

There are plenty of other methods to make masks. Yes, elastic is easy to use and attach but if the shortage continues on there won’t be any for you to use.

So I’ve compiled a few options below so you can use other methods if you have no more elastic, can’t get anymore and whatever other obstacles may be thrown your way.

My favourite mask pattern
Patrick Lose is one of my favourite fabric designers. His mask pattern is super easy, comes in a few sizes and you can make the tie using a strip of fabric. This style of mask means that the ties are not rubbing your ears. You also don’t need to measure fabric out – just print off the size mask and cut around it to make your template. Simples!

https://www.patricklose.com/face-mask-tutorial.htm

Options for ties
Ribbon, bias binding, cut up an old t-shirt (Jersey) and make strips: all suitable for the above style of mask.

Hair ties: however the best tip I’ve heard is to make the mask fabric reach your ear so that the hair tie isn’t ver stretched.

If you have elastic and its a wide one, consider making the bands go around your head more like a pair of goggles would sit.

If you don’t sew
If you don’t sew and don’t know anyone who can help you make your own please head to https://www.facebook.com/OzzieMasks/ and place an order with Cleary.

There are dozens of patterns and hacks out there for masks. Find the one that suits you.

Please stay safe and well.

Happy sewing!

Marni x

How to….. basting your quilt

I’ve been making quilts for about 18 years now and during that time there has been a lot of trial and error.

One of the things that seems to be the biggest issue/annoyance/hated job etc is basting your quilt for quilting.

So today I’m going to take you through a few of the options and the pros and cons of each. Best advice though is to try a few and find the one that suits you.

Side note: If you are quilting your own projects please follow the methods laid out below. If you are sending your quilt to a long-arm quilter (like me) please DO NOT baste your quilt. It unnecessary as we load the three layers of your quilt onto our frames separately. When in doubt ask your long-armer.

Spray Baste

This is the quick and dirty option. I LOVE spray baste because it is so quick and easy to do. However, its biggest downside is that it’s harder to baste really big projects unless you have a lot of room and a lot of spray. It’s also better to do this method with a friend, as the more hands the easier it is to handle the quilt top into position.

Spray baste is my go to for small projects – placemats and table runners. I even use it a bit for my machine embroidery projects. As it is a temporary hold its perfect for small jobs where pinning would take more time than is practical. The biggest quilt I have spray basted is probably a double bed size quilt. It wasn’t a quilt of mine – I was helping a customer and we did end up pinning around the outside edge.

The tips with spray baste are:

  • buy the best quality one you can as it reduces build up on your needle while quilting
  • once you’ve basted your quilt, run an iron over it as will stick better
  • don’t overspray – you don’t need a lot – spray a bit and then let it become tacky – the tackiness will guide you to how much you need
  • use in a well ventilated area/outside and if you have breathing issues a mask will help
  • don’t spray the fabric – spray the wadding, both sides

My favourite brand of spray baste is 505. I have tried others and I always come back to 505.

How to spray baste:

1. Lay your backing on a flat surface. Tape the edges down with masking tape so its taut but not tight.

2. Spray your wadding on one side, allow it to dry a bit and then lay the tacky side down on your backing fabric. Run your hands from the centre out, smoothing as you go. If you get wrinkles you can lift it back up and smooth it out again.

3. Spray the topside of the wadding. Wait for it to go a little tacky and then with your quilt top folded in half, place one side of the quilt top down, then unfold and lay the other half in place. Folding the quilt top up will allow you to position the quilt without too much hassle. Run your hands from the centre out, smoothing as you go. If you get wrinkles you can lift it back up and smooth it out again.

4. Once you are happy with the position of everything, remove the masking tape from your backing fabric. Then run your iron over both sides of the quilt, checking for lumps, wrinkles and any spot that might need more spray.

5. If your quilt is large, place some pins around the outside edge to stop it lifting as you handle the quilt during the quilting process.

The spray baste is temporary and will wash out when you wash your quilts. If you have any further queries regarding 505 spray baste please head here for the safety data PDF.


Pinning

Pinning is the original place I started basting my quilts. It was…let’s just say not fun. More injury than anything else. But it did get better with appropriate tools so I would recommend if you do go down the pin path to make sure you have a pin tool. It will save you time and stabbing yourself a bajillion times.

The best and most often method of pinning is to use curved safety pins and pin approximately 4in apart. The reasoning for this is because most wadding is advised to quilt no further apart than 4in so it’s keeping you in a working space that matches and is manageable under your needle. I use my hand as a guide because from my thumb to my pinky across the middle of my hand is pretty close to 4in. And if your hands are smaller that’s fine – pinning closer together isn’t a bad thing, it just means you will use more time and pins.

Thread basting
Honestly this is the original basting from when quilting was a baby and it is still used today – in a variety of uses. I personally do not use this method. Mainly because I loathe hand-sewing. Just not my thing. I do thread baste my EPP projects depending on the shape, most are glue basted with my Sewline glue pen. Thread basting can be done in two ways – needle and thread by hand or if its a big project you can have it machine basted by your long-armer (me!). Doing this by hand is great on small projects and is often the preferred method for those who like to hand-quilt.

Tips:

  • Use a good needle with a large eye, or a long needle (like a doll needle) – that way you can do the stitch faster, but make sure its a nice sharp needle
  • Use a high contrast thread so you can see it while you are basting and more importantly when you are trying to remove it
  • Use the length of the needle as your stitch guide if you are using a regular length needle and have trouble with eyeballing stitch placement

How to thread baste:

1. Lay your backing on a flat surface. Tape the edges down with masking tape so its taut but not tight. Place your wadding on top of the backing fabric and smooth it out. Then do the same with your quilt top. Smooth from the centre and make sure you have sufficient allowance on all sides.

2. Thread your needle with a long length of thread – not too long that you get tangled but a decent length.

3. Starting on one side in the middle of the quilt, stitch down into the quilt sandwich, com back up and go down again making a small loop. You can knot the end if you like but I find it easier to have no knots when removing threads at the end.

4. Work your way across the quilt in a 4in grid pattern.

Summary

Basting is a skill that will take practice and patience to master. Try all the techniques out there and find the one that works for you. It is achievable and you can do it. Start small and practice before you dive into larger projects.  If you have questions please ask – there are no silly questions when you’re learning a new skill.

If you decide basting is not for you, you can always get in touch with me for a quote to baste your quilt for you or to machine quilt it with a design/custom quilting. My contact details can be found here.

Double-sided tissue box cover pattern

Quarantine has done some strange things to us all but one of the good things that has come from it is that people have gone back to sewing more and it’s exciting to see what people are creating.

Whether it be a creative project, mending or making practical items for use around the home, it’s been nice to see my favourite past time becoming more front and centre.

I’ve designed a double-sided tissue box cover pattern, so that you can make themed covers for all of your tissue boxes and if you want to make them extra useful make one side one holiday and the inside another. Or if you’re like me just make them all your favourite theme.

Materials

1 – 15.5″ x 10″ rectangle of your outside fabric
1 – 15.5″ x 10″ rectangle of your inside fabric
2 – 4.5″ x 5.5″ squares of your outside fabric
1m approx of piping cord size 2
2in strip of fabric for piping

Interfacing is optional – if you do decide to use interfacing cut one rectangle and two squares. Iron onto the wrong side of your outer fabric. I used a very lightweight fusible vilene (one suitable for stitcheries).

Assembly
Cut out the pieces as listed above. Iron on interfacing if you chose this option.

Place the two 15.5″ x 10″ rectangles right sides together.

Fold in half and press, find the centre (5″) and then draw a 1″ rectangle around it that measures 2.5″ either side of the centre mark. 5″ x 1″ box.

Stitch on the line, reversing at the start and stop points. Trim your threads.

Cut the centre of the box along the centre line and then angle out into each corner, careful not to cut your stitching.

Turn the fabric through to the right side.

Roll the seams out so they are flat and press.

Top-stitch around the edge with a co-ordinating thread. Seam allowance is up to you to choose – mine was 1/8″.

Trim the edges.

Find the centre of the edge of the fabric and finger press. Then find the centre of the side panels and line them up. Pin in position. Do the same for both the outer and inner fabrics.

Stitch a 1/4″ seam leaving the seam open at the start and stop 1/4″. See pencil mark. Make sure you keep the inner and outer fabrics apart.
 

Pin the 4.5″ x 5.5″ side sections to the main panel and finish the seams. You will have an overhang of approx 1″ of the main panel. Don’t worry about this yet. Pin all four sides of the inner fabric and finish the seams with a 1/4″ seam.

 
Repeat for the outer fabric.

Then trim the overhang of the main panel to match the side panels of both fabrics.

Fold up a small seam and press. Do this for both inner and outer fabrics.

Make piping – fold your 2in strip of fabric in half, lay the piping cord in the centre. Set your machine up with its piping foot and move the needle to the furthest right-hand position. Make the full length of the strip and don’t reverse at the start and stop as we will need to open it a bit to finish it off at the end.

Pin piping into position all the way around the edge, leaving a tail to finish the ends. Pin so that both the inner and outer fabrics butt up against the round edge of the piping.

Stitch the piping on, this time moving the needle to the left and removing pins as you go. If you need to ease any of the inner fabric aim it for the corners or where your piping joins. I had some slight movement due to my interfacing stretching.

When you get to the end, pull the piping cord out of the piping casing and trim away the excess cord. You want the piping cord to curve into the seam and flatten out a bit so you can fold the ends over each other and down into the seam. Line up the piping so the two ends overlap. Trim away the excess of the piping cord fabric. Finishing stitching and do a little reverse stitch. Trim your threads.


One reversible tissue box cover. Enjoy!

I’d love to see if you make any of these. Please feel free to share on Instagram with the hashtag #Frankiestissueboxes

Happy sewing!

Marni x


Pin Keeper Pattern

There’s so much going on in the world right now that I though I might pop up a quick freebie project.

This is my Pin Keeper. It is a flag/banner style hanging that I made to keep my collection of enamel pins and brooches on.

Materials
10in x width of fabric strip
10in of Parlan (thin cotton fusible wadding)
6in of binding fabric
Spray baste or safety pins
Rotary cutter, ruler and mat
Sewing machine with walking foot
Thread
General sewing supplies

Cutting
Two, 3in binding strips
Three, 3in x 6.5in tab strips

Assembly
Trim off the selvedges and cut along the fold to separate the fabric.
Fold one piece in half lengthways (long length) and cut a 45degree angle across one end, approx 4.5in from the edge.

Fuse Parlan to the wrong side of the backing fabric piece. Baste the angled fabric piece to the backing and Parlan piece. You can use spray baste like 505 for a quick baste or just a handful of pins.

Quilt as desired. I simply straight line quilted across the short side a few times. Stitch 1/8in around the edge to secure and then trim back to the fabric line.

Tabs
Take the 3in x 6.5in strips for your tabs and fold them in half lengthwise. Press the fold. Open the fold and then fold the sides into the centre line and press again. Topstitch if desired. Then, fold the tabs in half to make a loop. Place the 3 tabs across the squared end of your flag with the raw edges matching the edge of the flag, spacing them evenly. Then pin and baste in place.

NOTE: Depending on how you want to hang your pin flag check the method that they will go onto your hanging rod. If they can slide onto a dowel make the tabs as above. If you have to insert your hanger into the tabs, do so before pinning and basting in place, and remember to be careful with the hanger and your machine while binding.

Binding
Join your main binding strips end-to-end using a 45degree seam, as you would normally prepare your binding. Trim and press all the seams open. Press the binding strip in half lengthways with the wrong sides facing.

Starting about one-third of the way along one side of the flag and leaving a tail for joining, sew the binding to the backside of the flag, mitring the corners as you go. You will need to do angled joins for the flag point that are 120 and 60degrees. Click here for my full post regarding this type of mitre. Stop about 6in from where you started, join the ends using your favourite method and finish attaching the binding.

Fold the binding around to the front side of the flag and stitch it down. Follow the other post regarding mitring the corners again.

Finish
Hang your pin flag up and add all of your pins!

2019 wash up

Here we are less than a month away from Christmas and boy what a year it has been.

Just wanted to leave this post up to say thank you for being here another year, for all of your support and patience with my health and the chaos that it caused.

Also – closing dates for this holiday season:

I will be working up till 4:30pm on Friday the 20th of December. Mail orders/pick up are most welcome until then.
As of the 21st I will be taking a small break so I can regroup. There will be no machine quilting happening. Mail orders can be placed but will not be shipped until the 3rd of January.

Machine quilting closes on the 9th of December with final collection by the 20th December so everyone has quilts in time for the big day. You can still book quilting spots – just send through a message 0416 023 637 or email frankensteinsfabrics@hotmail.com with your quilt dimensions, style of quilting (custom, edge-to-edge or stipple), due date and if you need backing and/or wadding. I’ll get a quote back to you.

I will be back at work on the 3rd of January and will respond to all messages then.

I’ll still be posting to IG and FB so if you feel like popping by and saying “Hi” or posting photos of your holiday sewing please feel free. I plan on doing a LOT of sewing over the break.

Classes for next year are currently listed under the “Events” tab on my Facebook page – you can book and pay via the website so you don’t miss out. Semester 1 dates only at this stage.

I hope everyone has a safe and Merry Christmas and New Year.

Happy quilting!

Marni x

Spring Sale!

Hello lovely people!

Just a quick note to say there’s a SALE on in the webstore. Click the store button and shop till your hearts content. All fabric is reduced and pretty much everything else as well. I decided a big spring clean was in order to make the most of the end of the year and streamline things as well as give you all some excellent bargains.

Any queries please don’t hesitate to ask.

Machine quilting is available from October until the 9th of December (last drop off date). Please contact me for a quote, lay-by options and to book.

I’ll be adding a few other things to the webstore in coming months – patterns, pre-made quilts and vouchers for both machine quilting and regular gift vouchers. These are mainly digital items so will need more work to get them uploaded.

In the meantime, happy shopping!

Marni x